
Tips and Tricks to Get Started with Notion + Mini Notion Tour
By: Lanie Brice ‘24
Notion has taken the planning world by storm in the last couple years, but it can be an intimidating and confusing tool to get started with. Notion offers the allure of nearly infinite possibility of formatting, planning, and notetaking within an app that’s available on your computer, iPad, and phone. I’ve been using Notion on and off for a couple years now, and it’s taken me a while to create systems that support what I need and are easy to stay consistent with. Here are my best tips for getting started with Notion and how to best utilize it to stay organized during this already chaotic semester.
Be Intentional with How You Will Realistically Use It
My biggest pitfall with Notion for years was that I would spend days working on these elaborate layouts before using it for a couple days and ultimately defaulting back to paper planning. Then, because my Notion was designed for daily updating, when I wanted to use it again I was overwhelmed by how many changes needed to be made.
I had to realize that, unlike a lot of the tutorials I watched on YouTube, Notion wasn’t going to be my everyday planning or habit tracking system. I have paper bullet journals that truly can’t be replaced by digital planning for me. I had to acknowledge why I found Notion useful—as a database for organizing my classes, notes, random ideas, and other details that I’d lose in the void of my files folder without Notion. When I stopped setting up spreads that needed constant attention, I actually started logging in more often. The moral of this story is to evaluate the gaps in your current systems and use Notion to fill those areas instead of making it the central part of your organization system immediately. If you’re building one from scratch, try out different systems on the platform until you find what works.
It’s not a one size fits all program, and I don’t think it was meant to be.
Start with Templates
As intimidating as a blank page can be normally, it’s even more daunting when you don’t know the language of the system enough to start customizing it yourself. From a million different board and table database options to bullet points, to-do lists, timelines, and image and video embedding — just to scratch the surface. There’s an option to fit almost every need, but it can be difficult to figure out what you need or how to access it when you’re first getting started. While I do recommend hitting the / button to bring up the menu of possible commands and scrolling through them, one of the fastest ways to have a functional (and aesthetic) spread is to choose from the thousands of existing templates.
The great thing about Notion templates is that they’re generally free and there are tons of them that cater to different needs like reading logs, college class organizers, YouTube upload trackers, and pages that help you plot or revise a book. The downside is that there’s not a great centralized place to find the best templates; they’re scattered all around the internet. The templates page on Notion might give you a couple ideas to start, but they generally lack many of the cool features you can find on independently created templates. While I’ll link my favorites from Rebecca Mix, I highly recommend searching “Notion Tour” or “Notion Templates” on YouTube along with the genre of template you need and then going through the description boxes for that creators’ (oftentimes free) Notion template.
Because they are free and easy to integrate into your own Notion, you can try out many different templates with the same function to see which work best for you; it’s also super easy to customize your copy of the template to better tailor it to what you need. In the process of modifying the template, you’ll start to learn the rhythm and flow of Notion better, and you’ll probably come up with some ideas to make spreads from scratch!
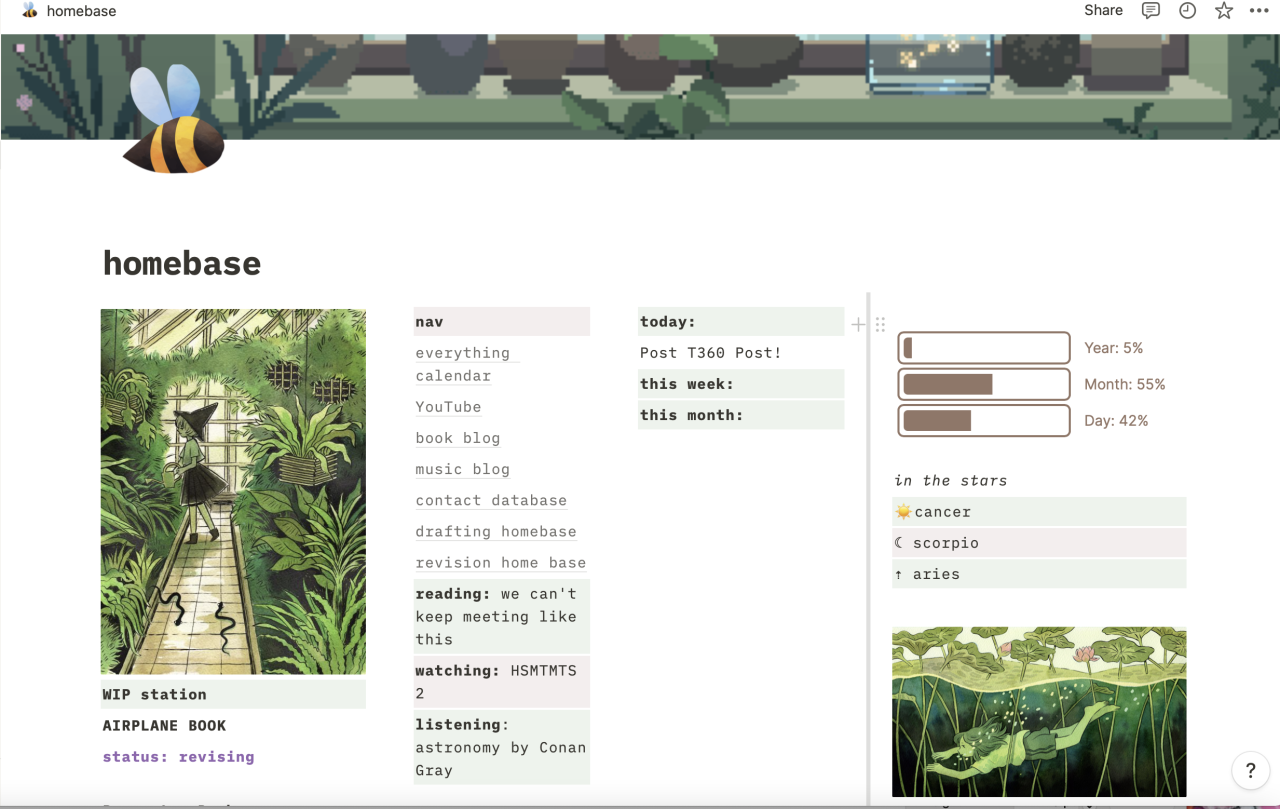
Consider It a Powerful Database
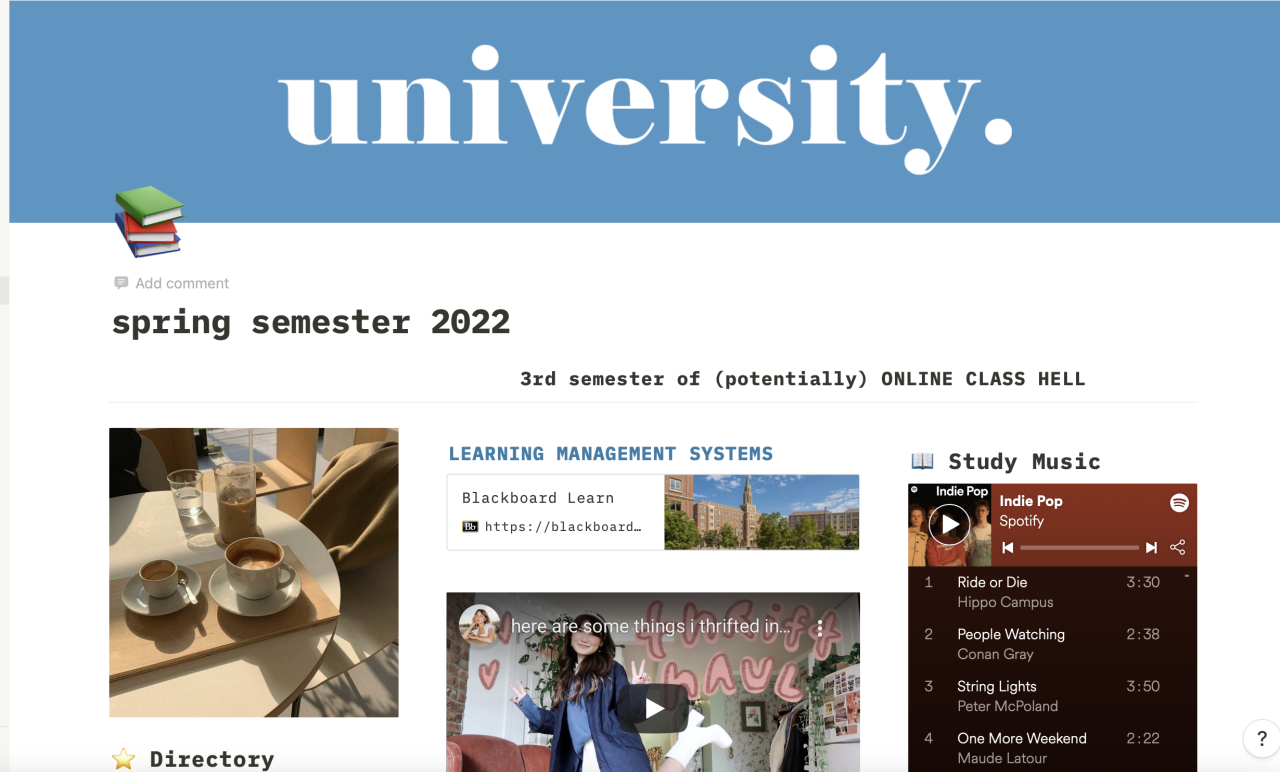
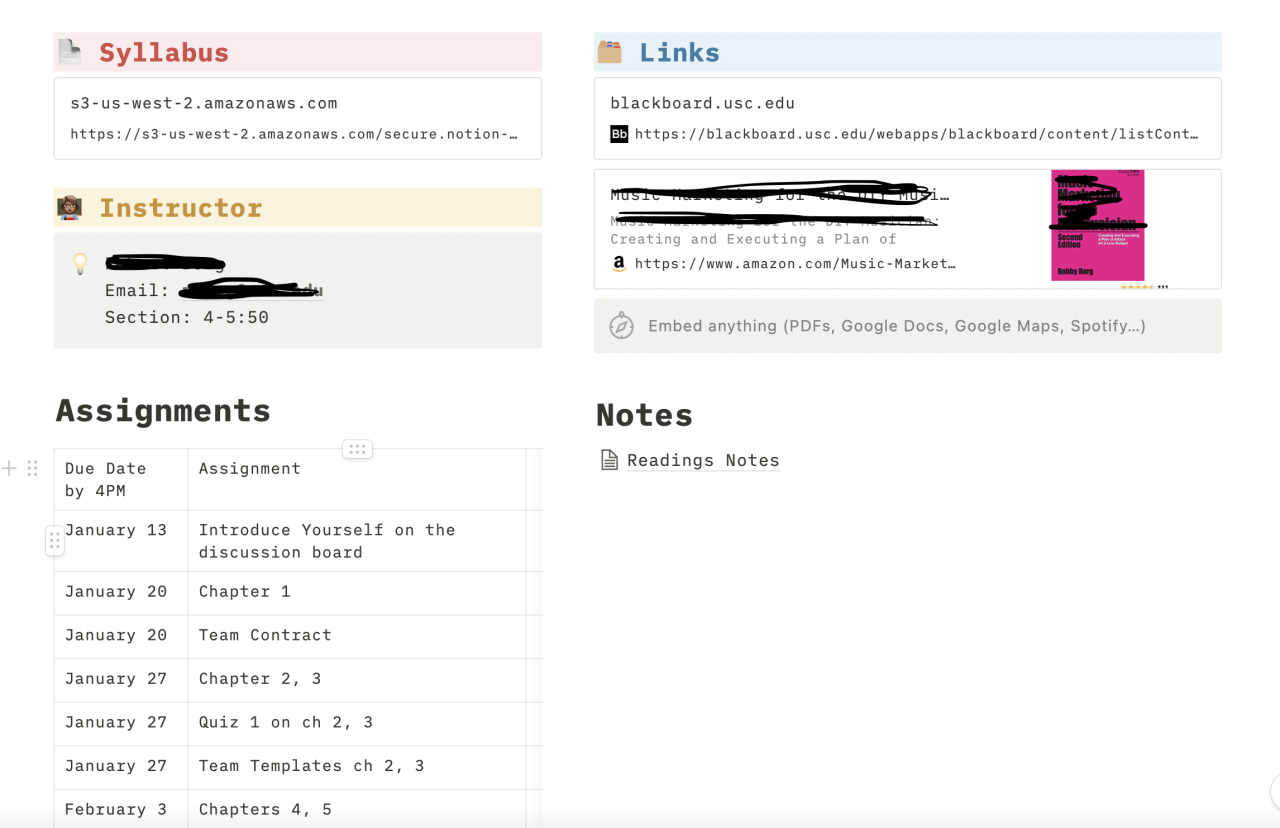
My biggest piece of Notion advice is to think of it like a homebase to keep all the information you’ll return to time and time again. For my spring classes, I worked off of a homepage template that could display my schedule, embed important links, and store individual pages for each of my classes. On those class pages, I have the BlackBoard link and syllabus stored right up top along with the professor’s name, email, and office hour times so they’re easy to reference. From there, I added a table feature to itemize all of the major assignments for each class and created a section to make new pages of notes. These are all evergreen things that I’ll need to reference on a somewhat regular basis, so it’s nice to have it contained in one place that’s easy to customize and add to as things update and change.
Beyond classwork, I utilize my Notion to organize my writing life. I have pages devoted to the books I’m writing and editing that are full of features and nested pages. I also have super simple spreads to track ideas for this blog, as well as my book, music blog, and YouTube videos because they can be fleeting.

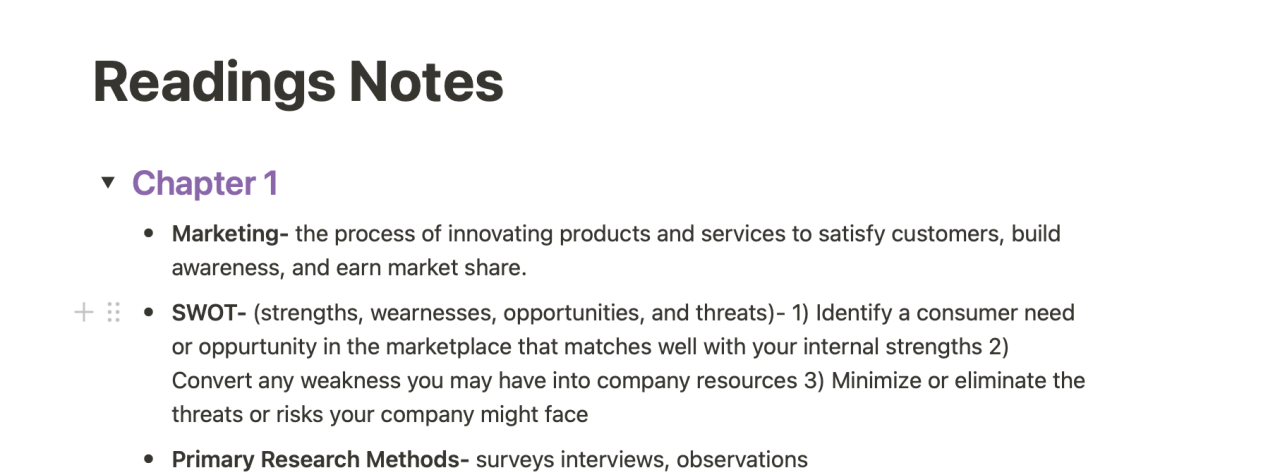
Keep All Your Notes In One Place
This is a new system that I’m starting up this semester, so I can’t give you a true testimonial, but so far, it’s worked really well. I like to take my notes during class by hand—especially when we’re on Zoom. But I don’t love trying to reread my handwriting or flip through my notebooks to find which lecture or reading talked about which particular topic when it comes time for midterms/finals.
So for spring, I’ve decided that I’m going to retype all of my notes into individual pages stored in Notion and categorized based on the syllabus. The way I set these up is a bit different for every class depending on the importance of reading materials versus the lecture, or if there are class notes that usually need to be saved for later.

In one class, I have each page labeled by week number and added toggle menus with headings so that I can open and close sections for every lecture of the week. For another class, I have these toggle sections organized by reading title with another spot for lab notes. In my more experience-based classes, I have pages for vocabulary terms and other miscellaneous things to remember. What I love about Notion is that I can have really granular organization for these notes, so it’ll be easy to find exactly what I want when I need to reflect on topics from earlier in the semester. I also love that they offer tons of features to divide and break up your notes so that they don’t ever feel like a never ending document.
There is an unmatched level of satisfaction in being able to turn a messy web of handwritten notes across a handout into a pristinely organized document. Future you will thank you.
Don’t Neglect the Board Database
These boards have been super popular in the bullet journal community for years, but they’re even better on Notion where you can super easily slide your cubes of tasks, information, or ideas between different headings to help you track your progress. Many of my writing jobs require coordinating interviews before the writing process even starts, so these boards can be super helpful in tracking the development stage of each story so nothing falls through the cracks. I also love them for tracking the completion of my ideas for blog posts and YouTube videos; that way I know exactly what stage in the process each idea is at.

This system can easily be adapted for managing school assignments like major essays, and it could even be interesting to load all of your weekly assignments onto this board to track your progress throughout the week if you use your Notion for more of a day-to-day planning system.
Functionality Over Looks (Make It Easy For Yourself)
This was a lesson I had to learn the hard way, and while I still stylize my pages as much as I reasonably can, I’ve had to get real with myself about the usefulness of the spread versus the time spent creating it. On a similar note, super intricate, detailed templates work great for some people but not well for others. I’ve tried plenty of much prettier and more elaborate systems for tracking articles and videos but the only one I’ve been able to be consistent with is the no frills board design. Try to be as honest with yourself as possible about whether a really simple design might create a better experience in the long run and that different areas of your life might need totally different systems.
Want more from Trojans 360?
Visit Trojans 360 on Facebook & Twitter to stay up to date with more student content! You can also Ask A Trojan an anonymous question, and we’ll try to answer it in a future post. And don’t forget to follow us on Instagram!
Trojans 360 is USC’s official student-run blog. Content created by students, for students.